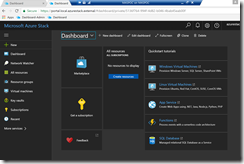
After I posted a picture on Twitter showing the Azure Stack Development Kit running on Azure, I got several question how I have done it.
First of all it was just a demonstration of our new nested virtualization capability available with the Dv3 and Ev3 VM sizes. I recommend to deploy the ASDK on-premises on hardware.
-> https://azure.microsoft.com/en-us/blog/introducing-the-new-dv3-and-ev3-vm-sizes/https://azure.microsoft.com/en-us/blog/introducing-the-new-dv3-and-ev3-vm-sizes/
-> https://azure.microsoft.com/en-us/blog/nested-virtualization-in-azure/
I started with creating a new Azure VM with Windows Server 2016 Datacenter as OS and the Standard_E16s_v3 as size on premium storage.
I added a 256 GB data disk (P20) for the CloudBuilder.vhdx and a 512 GB data disk (P20) for the four 128 GB data disk I created later for the Azure Stack deployment.
After the VM deployment finished the following steps were taken by me to get the Azure Stack Development Kit up and running.
- Added the Hyper-V role to the Azure VM
- Created a NAT Virtual Switch with the following PowerShell script
$SwitchTest=Get-VMSwitch -Name "NATSwitch" -ErrorAction SilentlyContinue
if($SwitchTest -eq $null){
    New-VMSwitch -Name "NATSwitch" -SwitchType Internal -Verbose
    $NIC=Get-NetAdapter|Out-GridView -PassThru
    New-NetIPAddress -IPAddress 172.16.0.1 -PrefixLength 24 -InterfaceIndex $NIC.ifIndex
    New-NetNat -Name "NATSwitch" -InternalIPInterfaceAddressPrefix "172.16.0.0/24" -Verbose
}
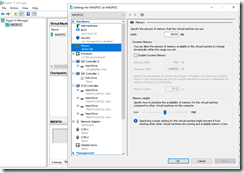
- Created a VM with 12 Cores, 96 GB memory and add the OS disk later.
- Downloaded the Azure Stack Development Kit
- Copied the CloudBuilder.vhdx onto the drive with 256 GB storage and attached it as OS disk to the newly created VM.
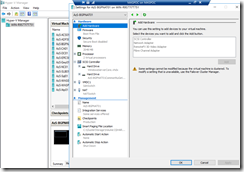
- Created four 128 GB data disks on the drive with 512 GB storage and attached them to the VM.
Before starting the VM mount the CloudBuilder.vhdx and edit the following files in the Microsoft.AzureStack.Solution.Deploy.CloudDeployment.1.0.522.0.nupkg file. To do that copy the file Microsoft.AzureStack.Solution.Deploy.CloudDeployment.1.0.522.0.nupkg to a folder and rename the .nupkg file to .zip and extract it.
- X:\content\Roles\PhysicalMachines\Tests\BareMetal.Tests.ps1
- X:\content\Configuration\Roles\Infrastructure\BareMetal\OneNodeRole.xml
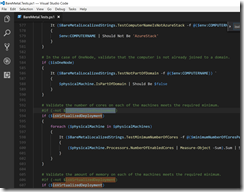
In the BareMetal.Test.ps1 search for the term $isVirtualizedDeployment and remove the -not in the if statement. Otherwise the deployment will fail.
In the OneNodeRole.xml edit the following lines.
<MinimumSizeOfDataDisksGB>100</MinimumSizeOfDataDisksGB>
<MinimumSizeOfSystemDiskGB>100</MinimumSizeOfSystemDiskGB>
I have set them to 100 to be able to deploy to smaller disk sizes.
After having edited the files, copy them back into the Microsoft.AzureStack.Solution.Deploy.CloudDeployment.1.0.522.0.zip with the Windows Explorer. Just double click on the .zip file and place the edited files into the target folders and rename the .zip file back to .nupkg. Then copy it back into the CloudBuilder.vhdx.
Last step enabling nested virtualization for the VM.
Set-VMProcessor -VMName MASPOC -ExposeVirtualizationExtensions $true -Verbose
Now the VM can be started. After the login set the VM’s IP address to 172.16.0.2 with subnet mask 255.255.255.0, gateway 172.16.0.1 and DNS server for example to 8.8.8.8.
Next step is to start the Azure Stack deployment out of the following place C:\CloudDeployment\Setup.
Use the following command to kick it off.
.\InstallAzureStackPOC.ps1 -InfraAzureDirectoryTenantName xxx.onmicrosoft.com -NATIPv4Subnet 172.16.0.0/24 -NATIPv4Address 172.16.0.3 -NATIPv4DefaultGateway 172.16.0.1 -Verbose
The deployment will fail at the step trying to register the necessary Azure AD applications. The reason for this is that the BGPNAT VM cannot access the Internet. I have worked around it creating another NAT Virtual Switch on the nested VM.
$SwitchTest=Get-VMSwitch -Name "NATSwitch" -ErrorAction SilentlyContinue
    if($SwitchTest -eq $null){
    New-VMSwitch -Name "NATSwitch" -SwitchType Internal -Verbose
    $NIC=Get-NetAdapter|Out-GridView -PassThru
    New-NetIPAddress -IPAddress 192.168.0.1 -PrefixLength 24 -InterfaceIndex $NIC.ifIndex
    New-NetNat -Name "NATSwitch" -InternalIPInterfaceAddressPrefix "192.168.0.0/24" -Verbose
}
Changing the Virtual Switch on the secondary NIC on the BGPNAT VM and logged into the BGPNAT VM and set the IP address to 192.168.0.2 with subnet mask 255.255.255.0 and gateway 192.168.0.1.
Afterwards run the following command to rerun the deployment.
.\InstallAzureStackPOC.ps1 -Rerun -Verbose
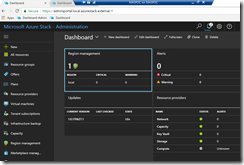
The deployment should complete successfully and you are now able to login to the Azure Stack Administration Portal and User Portal from the nested VM.

