Inspired by the blog post of my MVP buddy Ben Gelens on how to CentOS to Azure Stack and the partnership of Microsoft with Red Hat, I decided to write this blog post about RHEL 7.2 on Azure Stack.
-> https://azurestack.eu/2016/02/adding-centos-7-to-azure-stack-tp1/
-> https://azure.microsoft.com/en-us/campaigns/redhat/
-> https://www.redhat.com/en/about/press-releases/microsoft-and-red-hat-deliver-new-standard-enterprise-cloud-experiences
First you need a Red Hat subscription to get the Red Hat installation media and also to be able to update your Red Hat installation. The next step was to create a Hyper-V VM on my Windows 10 workstation with 2 vCPUs and 3.5 GB RAM similar to the Azure A2 VM size.
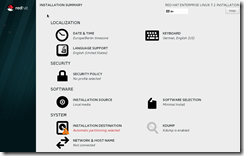
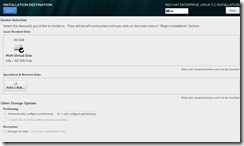
I have chosen the minimal installation option for my Red Hat VM. On the installation summary page I have added German as a keyboard type and done some settings regarding the installation notes in the Azure documentation.
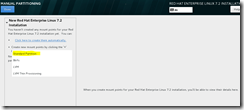
First step is to set the partition style to the “Standard Partition” option.
Second one is to activate the network connection. If you enable the network connection right here, you do not have to do it afterwards when the installation is finished.
After you logged in into the VM run the following command to connect the Red Hat installation with your Red Hat subscription. This is important for updates and additional package installations.
subscription-manager register --auto-attach
Before you install additional packages make sure you are successfully connected to your subscription.
subscription-manager list
Afterwards you need the following packages wget, unzip, python-pyasn1 and python-setuptools.
yum -y install wget unzip python-pyasn1 python-setuptools
Next one is updating the system.
yum -y update
Regarding the Azure documentation you have to modify the grub boot configuration. At this point I am using vi as my favorite editor under Linux. But you can use your favorite editor, if you want so.
vi /etc/default/grub
Now replace the existing GRUB_CMDLINE_LINUX line with the following one.
GRUB_CMDLINE_LINUX="rootdelay=300 console=ttyS0 earlyprintk=ttyS0"
Before you initiate a reboot the next step is to write a new grub config to the system.
grub2-mkconfig -o /boot/grub2/grub.cfg
init 6
After the VM is up again you install the recent version of the Azure Linux Agent onto the system.
wget https://github.com/Azure/WALinuxAgent/archive/v2.1.3.zip
unzip v2.1.3.zip
cd WALinuxAgent-2.1.3
python setup.py install --register-service
Thanks to Ben for the hint in his article that we need version 2.1.3 for Azure Stack.
The next step is to remove the installation files and disconnect the Red Hat installation from your Red Hat subscription.
cd ..
rm v2.1.3.zip -f
rm WALinuxAgent-2.1.3 –fR
subscription-manager remove --all
subscription-manager unregister
A very important part is to deactivate the temp drive in the Azure Linux Agent configuration. In the actual Azure Stack Technical Preview the temp drive is not supported and again a big thanks to Ben for mentioning this in his blog post!
vi /etc/waagent.conf
Search for the entry “ResourceDisk.Format=y” and change it to “ResourceDisk.Format=n”.
Prepare the VM to be used as an image in Azure Stack with the following commands and initiate a shutdown afterwards through the Hyper-V Manager.
waagent -force -deprovision
export HISTSIZE=0
logout
Now the Red Hat image is ready for the import. On the Azure Stack Hyper-V host open the MicrosoftAzureStackPOC.vhdx and navigate to the following path .CRPVMMicrosoft.AzureStack.Compute.InstallercontentScripts. Open a PowerShell window with administrative rights and execute the following PowerShell cmdlet for the import.
.\CopyImageToPlatformImageRepository.ps1 -PlatformImageRespositoryPath '\\SOFSShareCRPPlatformImages' -ImagePath 'C:\_Install\RedHatRedHat.vhd' -Publisher 'RedHat' -Offer 'RedHat' -Sku '7.2' -Version '7.2.0' -OsType 'Linux'
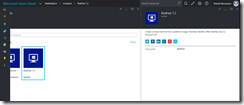
Then log in into the Azure Stack Portal. You should see in a couple of minutes the new marketplace item under Marketplace –> Compute.
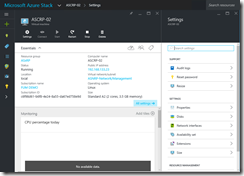
Now deploy a Red Hat VM. After the Red Hat VM deployed successfully have a look at the VM blade. Other than for a Windows VM you have not a connect option for a Linux VM in the portal. So you have to use for example Putty to connect to the Red Hat VM. Note down the public IP address and connect via Putty to the VM.
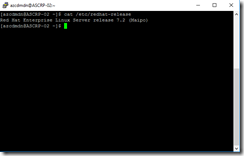
As you can see it Red Hat Enterprise Linux is now running on your Azure Stack installation. The final step again is to connect the Red Hat installation with your Red Hat subscription.
subscription-manager register --auto-attach
