In the first blog post of this series I have given you an overview of the InMage Scout architecture. For a short recap of what the Master Target is read the following lines.
The Master Target is used as repository and for retention. The Process Server sends its data of the Protected VM to the Master Target. In the next step the Master Target creates the Replica VM in the secondary site and holds the different retention points of different Protected VMs. You need more than one Master Target at your secondary site depending on the number of the VMs you want to protect.
Some other side notes. You need different Master Targets for Windows and Linux workloads. In the case of a failover to the secondary site and you want to do a failback to the primary site again you need several Master Targets at your primary site.
Before you start with creating the VM for your Windows Master Target have a look at the Microsoft best practices for sizing the Master Target and the supported OS.
| CPU | Memory | Boot Volume Capacity + Cache Directory Disk Size | Retention Disk Size | NICs with 1 Gbit/s |
| 8x vCPUs | 8 GB | 50 GB + 100 GB | Based on number of retention days and data change rate. | 1x |
These values are best practices by Microsoft. You can use lower values for your VM except of the Boot Volume Capacity + Cache Directory Disk Size. But I highly recommend to use the best practices values. If you want to protect more than 58 disks with a single Master Target you have to deploy additional Master Targets. You can have multiple Master Targets in your InMage Scout environment.
Windows Server 2008 R2, Windows Server 2012 and Windows Server 2012 R2 are supported operating systems for running the Windows Master Target.
Keep in mind that the Windows Master Target VM needs two disks. One for the boot volume and the cache and an additional one for the retention volume.
The size of the retention volume can be calculated in two ways. First one is change rate in GB * retention range in days. Second one is source disk sizes * change rate in percentage * retention range in days.
- 300 GB * 3 days = 900 GB
- 600 GB * 0,5 * 3 days = 900 GB (0,5 = 50%)
The easier one would be option one.
After you have successfully set upped the VM for your Windows Master Target and that can be the vContinuum server or a separate Windows Master Target start the vContinuum console.
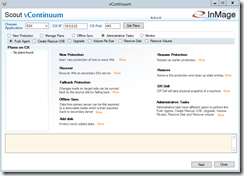
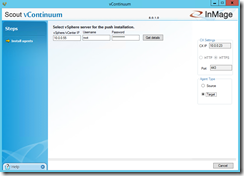
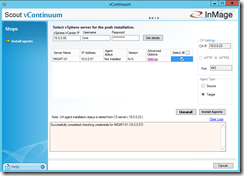
Navigate to Administrative Tasks and click on Push Agent. A new window will come up where you have to enter the IP address of your ESXi host or of your vCenter server and the credentials. Select Target as Agent Type and click on Get details.
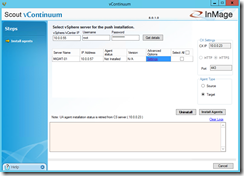
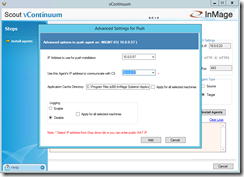
Afterwards you should see the VMs on the ESXi host and you can select your Windows Master Target VM for the push agent installation. Under Advanced Option you can define which IP address the Master Target should use for communication with the Configuration Server. Furthermore you can choose the Cache Directory.
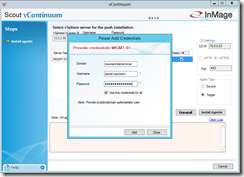
Select the VM you want to use as Windows Master Target in the column Select All. A new window pops up asking for administrator credentials. After hitting Add InMage Scout runs a check if it is possible to connect to the VM with the provided credentials.
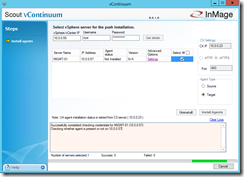
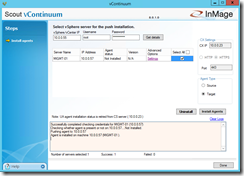
If the check returns a success event you can now click on Install Agents to initialize the push agent installation process.
After the successful agent installation on your Windows Master Target VM go back and log in into the management portal. In the management portal select Agent Heartbeat under Monitor and make sure your Windows Master Target VM shows up with the Agent Role Master Target.
The next blog post will be about the Windows Protection.
